Norman Verona Posted January 23, 2013 Posted January 23, 2013 So, slacken the bolt, centre the washer and tighten the bolt. Easy 2 minute job. Quote
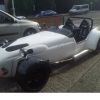
darve Posted January 25, 2013 Author Posted January 25, 2013 got a question on the mx5 SDV'ers out there....... I started to look at fitting the handbrake lever and have come across a snag!! The rear mount is way out! I've looked at Gary's diary and his looks fine. I've also looked at Doms and he had the bend the rear mount towards the rear of the car. However, mine is out the other way. I.e. the rear bracket welded to the chassis seems mounted too far towards the rear. I have bent the brack so the mounting hole comes towards the front of the car, but it still has a long way to go. Some pics will probably make this a lot clearer: I'm thinking the best idea here is to bend the bracket back and then use a bit of flat bar to essentially extend the bracket. What's your thoughts chaps or am I being a plum and missing something obvious? I am using rivnuts and countersunk bolts on the front due to the clearance issue with the propshaft. Is it worth shortening the front spacers a touch or will the use of countersunk bolts and stronger gearbox mounting rubbers be sufficient? Quote
Mark (smokey mow) Posted January 25, 2013 Posted January 25, 2013 What's your thoughts chaps or am I being a plum and missing something obvious? I am using rivnuts and countersunk bolts on the front due to the clearance issue with the propshaft. Is it worth shortening the front spacers a touch or will the use of countersunk bolts and stronger gearbox mounting rubbers be sufficient? I can't see that you're doing anything wrong there. either the bracket or the tube in the tunnel appear to be slightly out of position. Twisting/Bending/fettling normally works but your's looks a little too far out.I have shorter spacers and the stiffer mounts but with standard nyloc nuts and Now can't get the prop to knock any more even when drifting. Here's a test to prove it Quote
darve Posted January 25, 2013 Author Posted January 25, 2013 piece of flat bar it is then thanks for your help Quote
darve Posted January 25, 2013 Author Posted January 25, 2013 wasn't expecting that finish in the vid Quote
Mark (smokey mow) Posted January 25, 2013 Posted January 25, 2013 piece of flat bar it is then thanks for your help Sounds like a good plan, that's what I'd go for. HTH wasn't expecting that finish in the vid Just living up to my boardroom name Quote
KugaWestie Posted January 26, 2013 Posted January 26, 2013 Good to see you back on the build Dave Quote
darve Posted February 2, 2013 Author Posted February 2, 2013 Bracket fabricated today by modifying an old mx5 starter motor bracket. Painted to give a nice finish Front mount installed with countersunk bolts and rivnuts. this meant drilling through from the passenger side tunnel. Bit of a butt clench moment but got the holes in the right place just need to source a couple of grommets to plug the holes Hmm what to tackle next Quote
Mark (smokey mow) Posted February 2, 2013 Posted February 2, 2013 Job for tomorrow, I'd get the handbrake cable fitted and the brakes blead Quote
darve Posted February 23, 2013 Author Posted February 23, 2013 Well not had a day off work since 2nd feb so have been too busy for the build. Wont have a day off until next sat either. My mind needed something to focus on other than work so i pulled the wiring loom out of erm the dining room and had it all over the lounge floor i had already stripped out most of the redundant bits. started to tackle the dash end and seem to have very little to show for 3 to 4 hours of work! On a funny note.............sussing out the wiring is slightly tricky when you're colourblind! Big thanks to Mark for your dash wiring guide and mazda wiring diagrams Quote
Dommo Posted February 23, 2013 Posted February 23, 2013 started to tackle the dash end and seem to have very little to show for 3 to 4 hours of work! We all know that feeling! It's some kind of time black hole that occurs when stripping that loom! Quote
darve Posted March 6, 2013 Author Posted March 6, 2013 Have been a busy bee on the wiring loom!! Whole mazda loom stripped down to its individual circuits and a wiring diagram drawn up for each. Will be installing a new fuse box and relay box so the mazda ones aren't being used. Have been in contact with Omex and have almost finalised everything I need! Piccie time Have almost finished the dashboard wiring. Just need to get hold of an indicator switch, some 4.8mm spade terminals and a another connector block. I have used the connector blocks so the dash is easily removable. Have tried my best to make it as tidy as I can - I'm quite pleased with my handy work Quote
SootySport Posted March 6, 2013 Posted March 6, 2013 Nice layout for the dials and white Mmmmmmmmmmm. Can't beleive you are an accountant and can do all this, I salute you. Quote


Recommended Posts
Join the conversation
You can post now and register later. If you have an account, sign in now to post with your account.