Jump to content
Store Testing In Progress ×

Blogs

Engine setup

Finally Saturday was the day i've been waiting for since November, the rolling road set up. Well, it was a naff day, so the roof went on and off we went at 9am. standing water and rain all the way. arrived at 'AB garage' in Queensferry (Chester area). was invited in, made a brew and gave me a place to put the roof and doors once inside. Adrian was really helpful with the set up. asked me lots of questions and answered lots of mine, nothing was too much effort. the morning was spent setting u

Steve_Farrimond

Steve_Farrimond

Progress!

At last some progress. Tracked down the ignition lamp problem, damn wire had come off the alternator. Also gave it a jump start and the engine now runs perfectly. So happy boy at the mo. Tomorrows jobs: Fit Koso supplied speed sensor Investigate fitting Koso supplied oil temp sensor, to sump by all accounts so will probaby need a convertor Test fit everything to my temporary hardboard dash - it's a work of art I tell you And if time allows, programme the Koso ETA: Managed to set the

Andy Banks

Andy Banks

New Gear Indicator

I was getting fed up of not knowing what gear I was in so picked up a cheap ebay gear indicator and had a bash at making it work. Firstly my gear lever is up on the bottom of the dash and goes through the bulkhead so I fabricated a small carbon bracket mounted on stainless studding to allow adjustment to hold the two reed switches. The sensor magnet stuck to the gear selector shaft as it is mild steel. I placed a couple of cable ties around to hold it while I experimented with position. Next

IanG1

IanG1

Not going well today

Oh Dear Well I "think" everything is physically as it should be but I'm not having much luck so far. Today I have traced all the wires and double checked they are reconnected to the correct input on the Koso and I've checked fuses and done a rudimentary check on the immobiliser. What does work: All lights work as they should and the Koso responds correctly Fuel pump works Starter motor works What doesn't work: Engine running - turns over but does not fire Ignition warning

Andy Banks

Andy Banks

Take down started

The take down started yesterday, and I'm still going. What a mess these Westfield looms are. Fortunately I'm ditching a few switches and power feeds as I no longer have a windscreen but still...! Didn't take too long to extract the dash from the scuttle and I've stripped it now and will use as template to cut out a cheap bit of ply as a tester. I've also removed the heater at long last. Thanks to Adam Reeves, I reckon I've sorted the Savage switching too. Here's a pic of the Koso main loom (t

Andy Banks

Andy Banks

Chasing the elusive coolant leak

Ever since the car was built (and technically before whilst the engine was in the MX5) there's always been a coolant leak of some sort. I fixed most of them whilst the engine was out during the build but one remained - just above the oil pressure sender. I'd originally caught this leak and 'fixed' it by replacing the head gasket. Here's the leak from last time: As we're in a spell of cold weather with the roads once again salty, it seemed like a good time to strip it down and take a look. A

Dommo

Dommo

Half Hood

I have wanted to get myself one of these since before completing the build. I ordered one around a month ago from Soft Bits For Sevens, and I have had it for two weeks at home. I finally got around to fitting it to the car today I may make up some roof bars to span from the windscreen to the rollbar, but for now it is fine

KugaWestie

KugaWestie

First things first - planning and recording

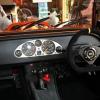
Due current lack of full-time work, I'm making a start on fitting the Koso RX2N Digital Dash that I bought at Stoneleigh in 2012 - so perhaps one of the smallest upgrades that will have taken the longest time to fit...!? So first things first - some recording of where and what things are today and a high-level plan of where I want to end up. I've mapped out all of the required feeds, power and earth wires from the Koso on a spreadsheet and cross referenced with the std Westfield Zetec loom. I'l

Andy Banks

Andy Banks

"Horse meet"

Given the recent news surrounding this horse meat kerfuffle I thought it best to check on my horses. M444444444TTB was already dropping his Westfield off at BTec racing for his carbs to be rebuilt and The Stoat was getting a go on the rollers to check his air fuel ratio - it only seemed natural to tag along. Since I've built it I've not been massively impressed with the speed of my Westfield. After wrapping up like the Michelin man I met with the above Swindonites and we convoy'd off. It was a

Dommo

Dommo

Swapping Xflow to Zetec in Narrow Lowline Westfield

As I said in my previous posts the lowline with 60mm engine mounts will just not fit below the bonnet line. How much will it not fit, here are are the photos to show: As you can see the timing belt is just proud so I have had to cut the nosecone to fit. As for the bonnet Its sitting on the engine brackets used for the crane, these will come off but its also sitting on the top of the timing belt/rocker cover. If you were doing this with highline body I reckon it would fit fine. So bonne

Meakin

Meakin

Swapping Xflow to Zetec in Narrow Lowline Westfield

Part 3 Fitting the engine into the car (will it fit?) First mistake, I thought "hmm gearbox oil tricky to get to, I know I'll put a litre in then I'll only have to top it off" DO NOT DO THIS! I knew I would have to tilt it to get it in but didn't realise by how much I have now wasted 1litre of oil and added a "nice smell" to my hat and drive floor. Second mistake, "I'll fit the speedo cable just as we put it in the car" This is a pain in the @rse and I'm still not certain its in right. This wa

Meakin

Meakin

Swapping Xflow to Zetec in Narrow Lowline Westfield

Part 2 Things coming together This time hopefully more photos, So as I am swapping both engine and gearbox, I decided that it would be better to mate them together out of the car and then test the clutch etc. and then fit the whole unit to the car. First stage flywheel: Very simple job, fit the bearing for the gearbox in the hole then put flywheel on and bolt in place. I used ARP bolts with the appropriate lock n seal (comes in a handy pritt stick style now) and, arp ultra torque fastener as

Meakin

Meakin

Insurance

We are insured though "ADRIAN FLUX" and they keep asking me, do I want an agreed value of the car? Does anyone think this is a good idea, if the car is stolen, damaged I would only get market value but if I fill in the forms for an agreed value I could get what the car is actually worth. Help!

PaulJones148

PaulJones148

Continues

So I found the wiring diagram for the patch cable, to connect the PC and easimap 4 to the 956 ecu. So I cut a standard serial cable and then re-jointed it in the correct order, with the resistors in place. if confused by the picture, the box is a decade box (simulates resistance). I had to use this to allow me to get 1050ohms as this isn't a standard value (but a resistor is on the way so the cable can be completed correctly) and guess that?? it worked.... the interesting things I found

Steve_Farrimond

Steve_Farrimond

Part 3 - Brass Monkeys!

Been a little while since my last update - some progress made, slightly beaten by the cold weather, but persevered All brake and fuel pipes now installed - routed the two fuel pipes either side of the Clutch master cylinder to give me plenty of clearance for the gearbox/clutch slave cylinder. http://s1358.beta.photobucket.com/user/scraggj/media/IMG_0144_zps73afa94e.jpg.html?sort=3&o=3 Getting heavy to turn the chassis - the wife is starting to complain. Perhaps I should offer some help!

JPLS

JPLS

Steering Wheel and Quick Release Upgrade

I decided to swap my flat bottomed steering wheel and QR for some new models So out with the old And in with the new - Brown & Geeson QR with a Momo Team 280mm diameter wheel For the usual suspects - that is a bit LESS blue in the car now

KugaWestie

KugaWestie

Winter upgrades

From this: To this: First upgrade of the winter There's a prize for lamest upgrade right?

Dommo

Dommo

The Westie to date

Well bought the car back in December and got it home the car had a slight miss fire and I originally put it down to be running on injection and Westfield building the car with a thermostat bypass on the water system, meaning that it never got up to temperature and inturn running on choke. So the first thing was to alter the water system. as you can see from the pictures above the original pipe is blocked and then redirected into a new pipe. the pics above show the path of the new pi

Steve_Farrimond

Steve_Farrimond

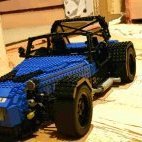
Lego nose cone, bonnet and rear arches

SHMBO is getting a bit peeved off now (even though I explain this is surely better than me spending every night in the pub or all night in the garage ) and the kids keep getting upset when I explain Lego is for adults not for children… …………. But I am getting there …. V8 ducted nose cone (could not manage to union jack ) V8 bonnet Rear arch with stone guards:

Lego Westy seats, steering, exhaust and cycle wings

Progressed further with the westy. Seats are installed along with rear sections of exhausts. I have also sorted the steering which is a simple lego rack and pinion set up. Here is one of the race seats: Chassis with steering, exhausts etc: 300 cfm holley carb with K&N filter Detail of cockpit area, everything looks to scale and in proportion which was hard to achieve with the gearbox and remote extension. Note the handbrake, now I dont like lego models that have fake steering/tra
  • Blog Statistics

    55
    Total Blogs
    435
    Total Entries
×
×
  • Create New...

Important Information

Please review our Terms of Use, Guidelines and Privacy Policy. We have placed cookies on your device to help make this website better. You can adjust your cookie settings, otherwise we'll assume you're okay to continue.