Jump to content

Leaderboard

Popular Content

Showing content with the highest reputation on 20/08/12 in all areas

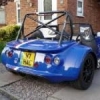
  1. Just saying hi as new to Westfields and the forum.. Another convert from two wheels as too old and busted up to race anymore !! Borrowed a mate's "redtop" for a couple of weeks and got hooked.. Really keen to get my own car now but not too sure what spec engine to go for ?? Want to enjoy blasting along the lanes to Wales and maybe the odd trackday or two.. Understand that outright bhp isn't everything but want something quite torquey (30-70mph fun) with great handling.. Redtop, zetec, duratec ?? (not keen on bike powered car).. I appreciate that this question / topic has probably been done to death in the past so any brief snippets of advice would be appreciated.. Was thinking of going to Curborough next week as long as there were a few Westfields there ?? Many Thanks..
    1 point
  2. I think it's a nice car and honestly I thought Mrs C might like it.
    1 point
  3. Surely he has at least one redeeming quality?
    1 point
  4. Fair's fair, she has to look at you every morning
    1 point
  5. I've just had similar idea... But i couldn't look at that every morning and no chance she'll get the garage!!!
    1 point
  6. Have you shown this to Mrs guest? she's after a pink Westfield but I reckon this would be just as much fun...
    1 point
  7. Already done it. My new 328i (2.0 turbo 245bhp but emits ony a waft of CO2) is averaging about 37 mpg over the first 7,000 miles. A a comparison the previous 330d got about 42mpg. Company cars and I'm paying about £25 per week net less when tax and private fuel taken into account. 330d a better drive though (same bhp but of course much more torque). But I won't go back to diesels.
    1 point
  8. I have fitted a Caterham red start button (cheaper from Farnells - order 3 and sell 2). Just use the outside terminals on the starter switch and wire one (with Schotchlock or better) to the large white ignition wire from the ignition switch barrel. Then cut the white/red starter solenoid wire near the ignition switch, insulate the short cut end at the ignition switch, and then connect the other side of the start button to the white/red wire to the starter solenoid. No need for a relay with this Caterham switch. Wiring it this way, the engine won't start if you turn the key to it's normal start position, the start switch takes care of the final key turn.
    1 point
  9. Perksy - I'm supprised you didn't answer this yourself - as you got plenty of info the last time you asked - but here's what I posted last time - plus other bits from along the way .... For anybody interested in using gelcoat (I had a thread going on the old BBS about this), I've now successfully filled the holes in the side panels left by the clamshells, and have a few tips out of the experience: 1) The hardner required for the gelcoat is Methyl Ethyl Ketone Peroxide - sold as Butanox M50 or Scott Bader Catalyst M. The ratio is officially 2% by weight, but 2% by vol is near enough. Scott Bader's local agent for the NW is in Denton (0161 336 0766), I got mine from Stevens at Sandbach (01270 529111) - they gave me some good technical advice as well 2) According to Bridget Ringrose at Scott Bader, "The repair should be carried out in dry conditions with a minimum continuous temperature of 15 Deg. C. The moulding should be kept in these conditions for a minimum of week". I was working in a garage with a fan heater, the temperature was around 15 C most of the time for the initial gelling, but may have dropped overnight - so far I've not had a problem with it. 3) I turned my gelcoat into 'flowcoat' by the addition of 2% vol of wax - what Stevens describe as 'Tack free solution', this meant that I could just leave the surface of the 'gelcoat' open to the air, and it would 'dry' rather than remaining tacky - a lot easier than having to seal the surface! 4) I prepared the panels by chamfering the edges of the holes to make sure there was no loose gelcoat (in some cases this meant making the holes a bit bigger , as the original holes weren't that tidy), and 'carving out' cracks in the gelcoat, so that the new coat could bond. 5) I patched the inside of the holes with a piece of fiberglass mat to give a surface to work fill onto. I also built up the depth in the holes a little with some isopon p40 - for smaller holes I just used the p40. 6) For measuring out the hardner & wax I bought a couple of 'baby medicine syringes' (used for squirting nasty medicines into the mouths of screaming brats! ) from the local chemist - a couple of quick checks told me that it was approximately 30 drops per ml, so 3 drops per 0.1 ml. 7) I made up small batches of gelcoat, of 20 ml of resin and 0.4 ml of hardner & wax (12 drops each), which started to gel (and become unworkable) in about 20-30 mins. I rarely used more than about 1/4 of what I had made, but smaller batches were too awkward to measure accurately. 8) I applied the first coat of gelcoat on the hole using a plastic spatula, leveling off the surface with a flat edge. After this had dried (gave it a day or so), I flattened the surface down with a stanley knife blade (this isn't Blue Peter so I can use the real name! ), scraping it across the surface, and checked there were no 'edges' showing through - if there were - it was a case of cutting them back as with previous 'cracks'. the surface was also 'scratched' to give a better surface for the next layer to bond to. 9) the next (final) coat of gelcoat was applied with a brush (there is a small amount of shrinkage in the gelcoat, so the surface won't be flat after the 1st coat if the gelcoat was quite thick), and deliberately applied it to raise the surface above the panel. When this layer has dried, the surface was again levelled with the stanley knife blade, and then sanded with 800 grade wet & dry. (I did go as far as trying 2000 grade w&d - but didn't get any better results over 800) 10) The final polish was done using Brasso which gives you back the deep shine I also got asked about 'star cracks' in the thread : I did a couple of them on the main body (not wings - as they'd just been replaced and so were unmarked - going to coat them on the underside with latex paint - yumee!! ) - I mentioned them in the main post as 'cracks'. You need to carve out along the lines of the crack to give a small 'V' (only just go through the gelcoat layer if you can) so that the gelcoat can bond. You're probably best levelling down the painted surface with wet & dry for these fine cracks as using a stanley knife blade can 'pull' the gelcoat out of these cracks (I found this out the hard way! ) If the cracks are on the wings - you may be best putting a glass fibre matting patch on the underside of the wing as well, as you may have lost a bit of strength there. And from what Perksy found out before ... I've spoken to a Helpful chap at ABL (stevens) in Sandbach, Cheshire. They supply Resins,GRP etc, his advice was to use an Epoxy resin, a Catalyst and the coloured Gel coat because "Epoxy adheres much better than Polyester..." HTH Steve
    1 point
×
×
  • Create New...

Important Information

Please review our Terms of Use, Guidelines and Privacy Policy. We have placed cookies on your device to help make this website better. You can adjust your cookie settings, otherwise we'll assume you're okay to continue.