


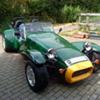
Swapping Xflow to Zetec in Narrow Lowline Westfield
Entry posted by Meakin
4,352 views
Well with pressures of work, I've not had much time to work on the car for a while.
But last weekend (and a bit of this weekend) has allowed me to make some progress. Here we go.
With the bonnet fitting nicely its time to add the ancillaries.
Alternator
Well I had a look to see if I could get the old xflow alternator into the space and the simple answer was "not without a lot of fiddling"
So I bought the alternator and bracket systems from Kit-spares. Okay quite a bit of money but well worth it. Simple o fit and really chuffed with the result. Interestingly though the wiring needed completely changing. The old loom had two permanent lives and a ignition light which was live on ignition. That has had to be completely changed (thanks to westfield-world for helping me work this one out). I use the permanent live connected to the battery (terminal B) the switched live to the 2 terminal and the light connected back to earth. This seems to work, although I shall wait and see.
Air filter.
After lots of discussions on the forums I've decided at this stage to keep it simple. Rather than lost of ducting or cutting the bonnet I have gone for some mesh filters onto the carbs:

There they are, they work well and will at least stop me sucking rocks, birds etc. I know that with it being under the bonnet its not sucking cool direct air but this may be for the future.
Radiator
After reading up on this I decided to go for the polo rad instead of sticking with he old escort one. This took making 4 brackets and a bit of "adjustment" to the mounts on the chassis. The pipe exits are aligned perfectly with the narrow body chassis (sigh) so a little adjustment is needed. I also used flexible pipes to attach the radiator.
I have bought a 95/100 fans switch but will probably keep it on manual to start with. Photo time:

As you can see I've used Silicon pipe (from a roll) for the main stretch rather than a metal pipe to connect all together. (I prefer the fewest amount of connections as possible. The bypass etc connect in a lower pipe so as to get rid of teh overcooling problem (I hope) As can be also seen I've used an xflow temperature sensor in a joiner between the flexible pipe and the silicon hose. Its quite far from the engine though so will have to see how it reads (I suspect a little low) it will also take a while to heat up as it only will get hot water when the thermostat has opened. Looking at other westfields they have the sensor towards the thermostat housing but but again would only be working when the thermostat opens. It would have taken more wire re-routing and space is a bit of a premium at that end so I thought I would see how this arrangement works.
Exhaust
As you all know I have been trying to keep the budget down. So the question of whether or not I could fit the old exhaust system onto the new manifold was always a possibility. Well the answer is: yes it can with a bit a jiggery pokery. My exhaust has two boxes welded together (to meet the IVA sound regs). I'm sure upgraditus will hit and I may change it in the future but budget is tight. So I managed to fit it by making an extra bracket and bolting it in place. In fairness the rear mount is only to support as the main strength comes from the manifold itself. Photo time:

As can be seen it makes it about 6" shorter. This isn't the best angle but so far it looks ok.
Ignition
Last part of this blog. I bought the no-diz ignition module instead of the traditional Megajolt. This was for two reasons: 1) It was cheaper and has more features, and 2) It doesn't need an EDIS ignition module (ie it plugs straight into the coil) This means the whole ignition system is new right from battery to plugs.
I've temporary wired it up to see if I could get the engine running. Wow what a piece of kit. Worked spot on and that was only in 2D mode. A total of 7 wires needed doing (2 to crank sensor on the flywheel) 1 to earth, three to the coil and 1 to a switched live. Piece of cake and engine sounds great. (will need tuning but will do that when I connect the TPS up)
Here is a photo of the temporary layout:

You can see the cooling system pipes, the No-Diz module with its spaghetti connected up temporary. Looks a bit of a mess at the moment but is just a matter of routing and tiding up (you see why earlier I kept the temperature sensor away)
The car has run and sounds great! Things to do now are tidy up, clutch cable and the propshaft.
More to follow
Paul
4 Comments
Recommended Comments