Flying Carrot Steve Posted April 13, 2023 Posted April 13, 2023 1 hour ago, SteveB21 said: Hi @Flying Carrot Steve - it definitely takes my helmet ok, with about 20cm length left spare. I can't comment on a detachable steering wheel though. The advertised 58cm x 30cm x 30cm dimensions are pretty accurate. With the helmet in for perspective I'd say that would also take a steering wheel at the same time. Thanks for the help 1 Quote
Stuart Davis - Devon Cornwall & Somerset AO Posted April 15, 2023 Author Posted April 15, 2023 Some bits and pieces for my Insta 360 X2; a utility frame so I can attach a tether, a mic adaptor so I can power at the same time as the mic is connected, oh, and a fluffy mic too, to try to avoid the wind noise! 1 Quote
Stuart Davis - Devon Cornwall & Somerset AO Posted April 23, 2023 Author Posted April 23, 2023 Quick release adaptor to the Insta 360 X2. Very nicely made. Quote
Stuart Davis - Devon Cornwall & Somerset AO Posted May 4, 2023 Author Posted May 4, 2023 A very nice pair of Carbon-NV half doors for me today. I’ve got a few ideas from here about how to fit them but may come back for some assistance when I’m ready to try. Quote
Stuart Davis - Devon Cornwall & Somerset AO Posted May 23, 2023 Author Posted May 23, 2023 I’ve had a few bits recently mainly for the Insta 360 camera. Some protective shields for the camera lenses, as I managed to get a small scratch on one, and a replacement rubber cover as I lost the last one More interesting is another phone mount. I have one of these already to hold the phone in the car, but wanted another to try some different camera angles on the body work. I plan to mount this on the driver’s side down quite low to view the front suspension/wheel. I’ll make sure I have a decent tether on it incase it drops off though! I’ve tested it already and it seems pretty firm. It has the added benefit that if you unscrew the ball head there is a photo thread which you can attach the Insta 360 to, makes for a nice secure connection. 2 Quote
Stuart Davis - Devon Cornwall & Somerset AO Posted June 14, 2023 Author Posted June 14, 2023 A nice six point harness for me. I’ve fitted it to my seat currently but may switch it to the passenger side so my little co-pilot is held more securely with no risk of submarining under the harness. Once sorted, I found it much easier to put on and adjust than my current 4 point, so I would like to source another one really. I think it would be better with pull down lap straps when used with my seats as the pull up ones are awkward to get to down the side of the seat. Might buy a new one. 2 Quote
Stuart Davis - Devon Cornwall & Somerset AO Posted August 14, 2023 Author Posted August 14, 2023 Spare accelerator pedal for me. This one has less of an offset to the right, and I will try to bend it so as to reduce the height vs the brake. If I mess up, I’ll still have the original! 2 Quote
Flying Carrot Steve Posted August 21, 2023 Posted August 21, 2023 A new LCD screen for my hopeless VDO speedo which has been intermittent for about 2 years. It's finally done my head in enough to buy a new one to fit. Plus sump and finger filter bolts and washers for my Raceline sump. 1 Quote
Euan Hoosearmy Posted August 22, 2023 Posted August 22, 2023 VDO screen replacement itself is easy, it's just getting the bezel off and back on again that's a pain. To get it off, I used some plastic pry tools from an electronics repair toolkit I have. Getting it back on, you need to make a firm surface with a dent in it for the push button to go in, then you can use a flat blade screwdriver to push the back ring of the bezel back down - it'll look crap from the back but if you're careful the front will be fine. 2 1 Quote
Flying Carrot Steve Posted August 22, 2023 Posted August 22, 2023 4 hours ago, Euan Hoosearmy said: VDO screen replacement itself is easy, it's just getting the bezel off and back on again that's a pain. To get it off, I used some plastic pry tools from an electronics repair toolkit I have. Getting it back on, you need to make a firm surface with a dent in it for the push button to go in, then you can use a flat blade screwdriver to push the back ring of the bezel back down - it'll look crap from the back but if you're careful the front will be fine. Hmmmm, I was hoping it would be dead simple. I know there are videos on YouTube showing how to do it so I'll check them but real life user experiences of actually doing it are often invaluable so I'm much obliged Euan Quote
Euan Hoosearmy Posted August 22, 2023 Posted August 22, 2023 2 hours ago, Flying Carrot Steve said: Hmmmm, I was hoping it would be dead simple. I know there are videos on YouTube showing how to do it so I'll check them but real life user experiences of actually doing it are often invaluable so I'm much obliged Euan The video by VDO that shows what to do is really good, apart from it's the other bezel design that twists off. Hopefully you have a twist off one ... but it's not that bad if you've the pressed on one. Other lesson learnt - plug it back into the dash and make sure the needle zeroes properly before you put it all back together - saves a lot of swearing if you haven't put the needle back on properly... 2 1 Quote
Flying Carrot Steve Posted August 24, 2023 Posted August 24, 2023 On 22/08/2023 at 19:56, Euan Hoosearmy said: The video by VDO that shows what to do is really good, apart from it's the other bezel design that twists off. Hopefully you have a twist off one ... but it's not that bad if you've the pressed on one. Other lesson learnt - plug it back into the dash and make sure the needle zeroes properly before you put it all back together - saves a lot of swearing if you haven't put the needle back on properly... Thanks that is really helpful info. What would I do without WSCC members! 3 Quote
Chris Broster Posted August 25, 2023 Posted August 25, 2023 A nice combination...thanks to @Rednop1 for the gorgeous AP Carbon Cycle Wings! 5 Quote
Flying Carrot Steve Posted August 25, 2023 Posted August 25, 2023 2 hours ago, Chris Broster - Bristol & Bath AO said: A nice combination...thanks to @Rednop1 for the gorgeous AP Carbon Cycle Wings! They look fab Chris! Quote
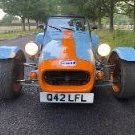
Andrzej Posted September 2, 2023 Posted September 2, 2023 Straight from NL, as all my kitcars - unfinished project 6 Quote


Recommended Posts
Join the conversation
You can post now and register later. If you have an account, sign in now to post with your account.