Pistons and Rods
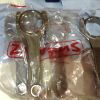
Ok so now onto the pistons and rods. In this case I am using SBD supplied steel rods and slipper piston kit.
So the rods come individually wrapped and at present come with no markings on them. In future I believe they may come laser etched. The important thing is not to mark them with anything that might introduce stress into the rods.
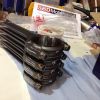
So I use a paint marker and put lines 1 4 onto one end of the rods so that not only is the rod identified, but also the cap will be maintained the right way around which is critical. In addition during this stage I also put the rods in a soft jaw vice and undo the fasteners as this are done up very tight initially. I also put an extra mark on the end of the cap with the paint pen. A sharpie marker also works well.
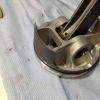
next taking the pistons I fit the rings to them following the instructions. Marking on the top ring should be face up and the oil ring is made of space that must be put in place first with the oils scrapers added each side. I space the ring gaps 180 degrees apart from each other. Then fit the piston onto the rod securing the gudgeon pin with the C clips and checking they are seated properly in the groove. For clarity I ensure that the rod markings are on the same side of the piston. The piston face has different cut outs for inlet (large) and exhaust (smaller) so I always put the piston on the rod the same way around to make checking and inspection simpler.
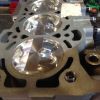
Now fit each piston to the block in the right order for the rod markings. Also pay attention to make sure the inlet pockets are on the inlet side of the engine.
Different people use different techniques to compress the rings into the block. The only time I have ever broke a ring is using a compression tester, so I work the ring into position using a pair of plastic pocking sticks while easing the piston into place manually. Many will hate this idea - but its always worked very well for me.
Once they are all in position then turn the block over and unscrew the main cap bolts and separate the rod end caps and place on the bench. The main bearings can be fitted to the rod and cap, These are then liberally coated in assembly lube and the caps refitted ensuring the right cap is on the right rod and the right way around using the earlier markings. The bolts are then done up finger tight.
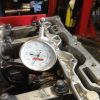
I do the rod bolts using an ARP stretch gauge. These can be picked up in the US for very little and are the only accurate way to pre-load the bolt. Now normally I fit the crank and rods before the main bearing ladder to give more access to the stretch gauge, but I forgot on this assembly so fitting the stretch gauge is a little tight. The gauge fits in the head of the rod bolt and on a small indent on the bottom of the bolt. It can then be zero''d while the bolt is not tight. I then usually tighten the bolt in sequenced torque settings and re-measure. If the main ladder is left out till after this stage then a good quality ring spanner can be fitted which lets you tighten wilt measuring the stretch. A stretch of 6-7 thou is required for the bolts I am using.
In addition to the above I measure accurately the length of each fitted bolt and the location. This isn't so I can determine their re-use or not, but rather so that on tear down I can check for any additional stretch in the bolts.
Once this is complete I turn the engine over a few times to check all is ok.
Next.... Head build up.
-
 1
1


1 Comment
Recommended Comments